0. Welcome to DISH Pay Now
Table of Contents
Congratulations on purchasing the DISH Pay Now device!

To get started, watch our full onboarding video!
Check out our complete 3-step onboarding guide:
Click here for details
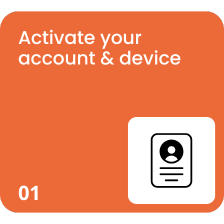
Step 1: Activate your account
1. Scan the QR code and register
Option 1: Scan the QR code provided. 
Option 2: Visit this URL: http://www.dish.co/DPN-register
2. Subscribe to DISH
a) If you don't have an account yet, create one by following the on-screen instructions.
b) If you already have an account, log in.
Have your login credentials ready. You will need them in Step 2: Completing Device Onboarding.
3. Create your own establishment
After logging in, go to the option to add your business.
Follow the provided account verification steps. ( Tip: For detailed steps, refer to the account verification flow documentation if needed. )
4. Activate your account
First, choose to accept the DISH Pay Special Terms and Conditions. Your device is being activated, please wait a moment before proceeding.
5. Provide company information
Please carefully fill in all the company details requested during the verification process.
If you have any questions or need more information, please see our detailed guide for Step 1 here .
6. Upload your business documents
Collect the following documents to upload:
- Valid identity document:
Accepted identification documents include passports, national identity cards or driving licences.
- Recent bank statement:
It must be from your business account and no older than three months.
- Company registration document:
Examples: Certificate of Incorporation, VAT Registration or other official government-issued proof of registration.
- Additional requirement for businesses with multiple owners:
If your business has more than one owner, upload the identity documents of all the beneficial owners of the business (UBO).
Important:
Make sure all documents are:
- Clear and completely readable.
- Upload in the requested format (e.g. PDF, JPG).
7. Review and submit
Submit your documents and verify that the system confirms successful upload.
If you have any questions or need more information, please see our detailed guide for Step 1 here , check out the FAQ section for assistance, or contact the DISH support team for assistance and documented answers.
Click here for details
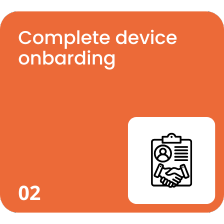
Step 2: Complete the device onboarding. Spend about 30 minutes of your time on the next steps.
Important: Before you begin, be sure to register on DISH .co .
1. Recharge your card reader
2. Turn the card reader on/off
3. Choose your preferred language
Select the language you feel most comfortable with from the options provided.
4. Connect to Wi-Fi
Select your preferred Wi-Fi network and enter the password to connect.
5. Create or log in to your Google account
Important: Make sure you have created a Google account in the country where you currently reside.
a) If you don't have a Google account yet, create one by following the on-screen instructions. Here you can find how to create a Google account .
b) If you already have an account, log in.
Your Google Account is essential to ensure that you receive the necessary updates for DISH Pay Now and to ensure that your device can work seamlessly. Since your Google Account has no further influence on your DISH Pay profile, it doesn't matter whether you sign in with a personal or business Google Account.
6. Set Google Chrome as your default browser
When prompted, select Google Chrome as your default web browser.
7. Set a PIN Code
Choose a secure PIN code to protect your device.
8. Skip Google Pay feature
If you're prompted to set up Google Pay , skip this step – it's not required for DISH Pay Now.
9. Choose DISH Pay Launcher as your default homepage app
When prompted, select DISH Pay Launcher as the default Home app. (This step is mandatory to ensure full functionality of the device.)
10. Update the DISH Pay app
Go to the update option and make sure your DISH Pay App is updated with the latest features.
11. Log in to your DISH Account
To log in, use the same credentials you created in "Step 1: Account Registration".
If you have any questions or need more information, please see our detailed guide for step 2 by clicking here .
Click here for details
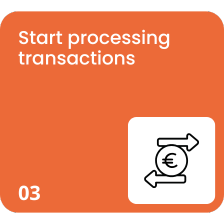
Phase 3: Start processing transactions
1. Congratulations!
You have now successfully logged into the DISH Pay app on your device.
2. Make sure your device is signed in to your Google account
This step ensures that you receive all updates for the DISH Pay app.
3. Get the latest DISH Pay app update
When you launch the DISH Pay app on your device for the first time, it automatically checks for updates.
To complete this step, make sure your device is connected to Wi-Fi and signed in to your Google Account.
4. Processing your first transaction
- Open the DISH Pay app.
- Enter the amount you wish to charge.
- Tap to load .
Follow the on-screen instructions to complete the payment process.
5. Find out more
For more information and detailed instructions on how to process your first transaction on your device with the DISH Pay app, click here.
Did you follow all the steps? Congratulations on setting up your DISH Pay Now device! If you have any additional questions, please check out our FAQs or contact our customer support team at DISH .co
Frequently Asked Questions
Device battery consumption: How long does the battery last (hours/days, etc.)?
This will vary depending on usage. The included charging dock allows you to charge the device without having to plug and unplug, and battery life can last up to 4 hours with frequent unplugged use.
I already have a DPN device, can I purchase a DISH payment terminal?
Yes, we will be happy to support you with another DISH Pay device! Just click the following link and contact our team. (Click here ) A sales representative will respond to your request shortly.
How can I get another device?
Would you like to get another DISH Pay device? Through the following link (click here ) you can get in touch with our sales representative who will be happy to support you with another device
My device is not working: what can I do?
- Try turning it on/off
- Update the app
- Make sure you have a valid Wi-Fi connection
Contact Dish Support Team
My device won't turn on: what should I do?
If your device won't start up, has a black or blank screen, or turns on but then shuts off right away, try these steps to fix the problem.
Press and hold the power button for 5-7 seconds or up to 30 seconds.
If the device still does not turn on, contact DISH Support. Click here for our contact information.