DISH
Tutorials
DISH mobile app
A walkthrough of the DISH mobile app
DISH App - How to manage team members in the app
How do I access my tools' dashboard through my mobile device?
How do I change my password in the DISH mobile app?
How do I edit my account information in the DISH mobile app?
How do I set up a pin number for my DISH app ?
Visit my dashboard in the DISH mobile app
Bank transfer payment in Coatia 🇭🇷
Bank transfer payment in Hungary 🇭🇺
How do I access the blog on dish.co?
How do I add a new team member?
How do I cancel my DISH subscription?
How do I change my password on dish.co?
How do I change my payment details?
How do I contact the support via WhatsApp?
How do I create a DISH account?
How do I create flyers and QR labels?
How do I downgrade my subscription?
How do I edit information of my establishment?
How do I upgrade to DISH Premium?
How do I view my DISH Product invoices?
How to edit information on my account?
How to edit my notification settings?
FAQs
Customer Support
DISH POS
First steps with DISH POS
DISH POS Onboarding
Receiving your DISH POS shipment
What should I know about my DISH POS Hardware Warranty?
What should I know about storing my hardware?
🔒 Introduction and most important functions of your DISH POS
Backoffice
Articles
How do I add a fixed-price menu?
How do I add a new product group?
How do I add a product and assign it to a menu?
How do I add and assign a packaging profile?
How do I add and manage derived menus?
How do I add and manage price levels?
How do I add and manage price sets?
How do I add and manage promotions on DISH POS?
How do I add time restrictions to my menus?
How do I adjust product details in the list view?
How do I adjust product details?
How do I assign allergens and additives to a product?
How do I assign menus for specific areas and times?
How do I assign price levels to my store?
How do I assign sales and restrictions to products and product groups?
How do I create composites of multiple articles?
How do I find products with the search and filter function?
How do I manage and add products?
How do I manage and arrange menus (incl. sub-menus)?
How do I set up a production order?
How to add a menu with multiple options?
Finance
How do I export a shift report?
How do I generate and export turnover reports?
How do I retrieve a shift report?
How do I retrieve orders in the back office?
Updated Z-report DISH POS
General
User groups
How can I add and manage a printer?
How can I add and manage table maps?
How can I add and manage users?
How do I add and manage a user group?
How do I add and manage cash stores?
How do I add and manage courses?
How do I add and manage currencies?
How do I add and manage customers?
How do I add and manage fixed discounts for my stores?
How do I add and manage production stations?
How do I add and manage turnover categories?
How do I add or manage areas and facilities? (e.g. tables)
How do I adjust the production ticket layout?
How do I create a NATIVE gift card?
How do I create app links for my POS devices?
How do I have a payment QR code printed by default?
How do I implement Takeaway in Germany?
How do I link DISH Reservation to my POS devices?
How do I manage my POS device?
How do I send changes from the Backoffice to my POS?
How do I set up a buzzer/zoomer?
How do I set up different permissions for users on DISH POS?
How do I set up multiple languages for facilities?
How do I translate menu items?
How to display the lottery function and adjust its position within the app? - Italy only 🇮🇹
Payment
How do I add a Pagamento non riscosso? 🇮🇹
How do I add and manage payment methods (incl. payment menus)?
How do I manage EFT devices?
Setting Up a Stand-Alone EFT Terminal 🇩🇪
Self-service
QR codes
Adjusting the appearance of the self service QR shop
How can I change settings for DISH Payment?
How can I configure random spot checks on my self-service POS/Grab and Go POS?
How do I activate the Pay on pick up functionality?
How do I add and manage time schedules for the self-service?
How do I adjust and personalise my webshop?
How do I adjust the appearance of the kiosk?
How do I create QR codes for the self-service?
How do I link two different menus in the Kiosk based on Eat-In or Takeaway?
How do I reorder via a QR code on the table? (Customer perspective)
How do I set up the imprint for web shops and QR sales channels?
DISH POS BI
How can I disable automated ticket printing?
How do I change my password?
How to access the Backoffice?
Overview of the dashboard on the backoffice
App
Installation
How can I download the new POS App?
How do I connect the DISH POS app to my system?
How do I update my DISH POS app?
App-functions
How can I register cash transactions for the cash book? (Kassenbuch)
How do I access the set-up web links on my device?
How do I adjust the stock information of a product?
How do I close the shifts on my device?
How do I disable ticket printing from my device?
How do I enter tip when cashing out?
How do I print reports from my device?
How do I reopen orders?
How do I search for an order on my device?
How do I select a facility on my device?
How do I select an EFT device on my device?
Working with the app
An overview of the general functions for an open table
An overview of the screen features for an open table
How can I activate the Digital Receipt?
How can I get the Factura Simplificada? (Spain only 🇪🇸)
How can I let the customer pay via a QR code?
How can I manage tables in the block view?
How can I open a table?
How can I retrieve payments that could not be linked to an order?
How can I send my customer a digital receipt?
How can I split or move a table?
How do I open and close a self-service on my device?
How do I print a receipt in a different language? - Spain only 🇪🇸
How do I activate my Giftcard? (only for 🇳🇱)
How do I add or remove recycling deposits of a table?
How do I adjust a product in the ordering process?
How do I cancel orders and enter a reason for it? (Germany only 🇩🇪)
How do I cash out a table?
How do I check the current balance of a gift card?
How do I fill out and save the Factura Completa? (Spain only 🇪🇸)
How do I fill out and save the Fattura Elettronica? (only for 🇮🇹)
How do I issue a gift card? (only for 🇩🇪)
How do I link payment methods in Omniboost? (only for 🇳🇱)
How do I manage tables on my device?
How do I map of payment methods in Combidesk? (only for 🇳🇱)
How do I move orders from tables on the table map?
How do I print hospitality receipts?
How do I redeem a native gift card?
How do I search for a product in the POS app?
How do I select a fixed-price menus for an order?
How do I set up flexible payment during a visit?
How do I use the lottery ticket feature? - Italy only 🇮🇹
How to log in and out of the DISH POS App?
How to manage customer accounts in the App?
New POS App - How can I split or move a table?
Settings
How can I manage the hardware settings for my device?
How do I adjust the connection settings for my device?
How do I adjust the view of the facilities screen for my device?
How do I adjust the view of the menu and order screen on my device?
How do I adjust the view of the payment screen on my device?
How do I adjust the view of the stock overview on my device?
How do I change the display orientation on my device?
How do I change the input mode on my device?
How do I manage log in and log out settings for my device?
FAQs
DISH POS Insights App
How do I install the DISH POS Insights App?
How do I retrieve reports from the DISH POS Insights App?
How to count my drawer on DISH POS Insights App?
Turnover Dashboard on DISH POS Insights
POS Troubleshooting Hub
Cash Drawer: common issues and troubleshooting
DISH POS Handheld: common issues and troubleshooting
DISH POS Printer (Epson): common issues and troubleshooting
DISH POS Screen: common issues and troubleshooting
What to do in case of hardware related issues ?
How to change the delivery options with UPS?
🔒 DISH POS Hardware Warranty Scope
Instapkassa
FAQs
Backoffice
Articles
Adding a new product group
Adding and managing turnover groups
Adjusting product details
How can I assign allergens and additives to a product?
How do I can and assign a packaging profile?
Manage and adding products
Managing and arranging menus (incl. sub-menus)
General
Adding a product and assigning it to a menu
Adding and managing user groups
Functions of the dashboard
How do I add and manage users?
Finance
POS
General
Adjusting product functions
Adjusting the facilities view
An overview of the general functions for an open table
Opening tables
Reopening orders
Payment
Sales
Downloads
DISH Pay
DISH Pay Now
Welcome to DISH Pay Now
0. Welcome to DISH Pay Now
1. Activate your account
2. Complete device onboarding
3. Start processing transactions
DISH Pay Now Datasheet
FAQ - DISH Pay Now
General / How to use
DISH Pay Now - How can I activate DISH Pay Launcher?
DISH Pay Now - How can I fix login issues I might encounter with the DISH Pay app?
DISH Pay Now - How do I access my transactions list in the DISH Pay app?
DISH Pay Now - How do I create my own Google account for DISH Pay Now?
DISH Pay Now - How do I log in to the DISH Pay app and do my first transaction?
DISH Pay Now - How do I provide a digital receipt with my DISH Pay app?
DISH Pay Now - How do I send a refund from the DISH Pay app?
Tap to Pay
How can I fix login issues I might encounter with the DISH Pay app?
How do I access my transactions list in the DISH Pay app?
How do I provide a digital receipt with my DISH Pay app?
How do I send a refund from the DISH Pay app?
Self-Installation guide for Tap to Pay with Motorola G14
Tap to Pay Terminal - Motorola G14
S1F2
V400m
V400c Plus
DISH Pay - V400c Plus - Data sheet
V400c Plus - Self-Installation User Manual
V400c Plus - Standard User Manual
P400 Plus
FAQs
General Information & Documents
Unreferenced refund activation request
DISH Order
First steps with DISH Order
Tutorials
General / How to start
Dashboard
An overview of the dashboard
How can I adjust the settings of a restaurants location?
How do I accept an order on the Dashboard ?
How do I auto deactivate the webshop?
How do I cancel an order with reasoning in the Dashboard?
How do I define additional fees for a payment method?
How do I download customer's data?
How do I edit legal information of the restaurant?
How do I edit my location?
How do I enable the reusable food container option?
How do I integrate PayPal as a payment method?
How do I integrate online payment methods?
How do I manage my orders without using the order terminal?
How do I manage my orders?
How do I manage the data of a registered customer?
How do I set up and change menu categories?
How do I set up and change menu items?
How do I set up coupons in my webshop?
How do I set up delivery areas of a restaurants location?
How do I set up options and allergens into my webshop?
How do I set up special prices to menu items?
How to add a discount to a menu item?
How to add allergenes & additivies to a menu item?
How to adjust opening hours of a restaurants location?
How to set up mealtimes?
Order Terminal
How to add a new device/order terminal?
How to cancel an order with reasoning?
How to connect my webshop to my website?
How to display account & contact information?
How to log in to the order terminal?
How to manage orders via the terminal?
Terminal - How to adjust my opening hours?
Terminal - How to disconnect the restaurant account on the app?
Terminal - How to print orders?
Terminal - How to scan a barcode?
Storefront
How does it look like for my guests?
How to access the storefront/guest view?
How to register a user?
3rd Party Integrations
How to add an order button on Facebook?
How to disable other food ordering providers on Google?
How to integrate DISH Order to the Google entry of my restaurant?
How to link DISH Order with the Instagram account of the restaurant?
How to select DISH Order as your preferred food ordering provider on Google?
FAQs
Documents & Tools
DISH Reservation
Onboarding
FAQs
General / How to use
How do I create an offer to be displayed on my reservation widget?
How do I edit or add opening hours?
How do I edit or add tables in my table plan?
How do I export data from DISH Reservation?
How do I integrate the reservation tool into Google Business? [PREMIUM]
How do I login in DISH Reservation?
How do I manage the amount of online reservations I receive?
How do I reply to customer feedback?
How do I set a booking limit?
How do I set up and use service hours?
How do I use internal notes in the reservation tools?
How to access DISH Reservation through a mobile device?
How to activate the Push-Notification function?
How to add walk-in guests in DISH Reservation?
How to adjust the reservation status?
How to change the table booking priority?
How to change your password in DISH Reservation?
How to configure table groups?
How to create a PDF file of my reservations?
How to purchase and setup our new DISH Reservation Premium SMS package?
Admin panel
How to Manage Reservations in DISH Reservation?
How to add a Special Menu?
How to add a daily menu?
How to add a fixed menu?
How to add a time menu?
How to manage all account-related information?
How to manage all reservations settings?
How to manage reservations on the table plan?
How to manage the guest database?
How to manage users who will receive notifications?
How to set up the reservations (seat-based or table-based)?
How to view and publish guests feedback?
Overview of the Reports
Connecting Facebook/Instagram
Facebook/Instagram reservation button information
DISH Reservation - How to activate Reserve with Facebook and Reserve with Instagram?
How do I activate Reserve with Facebook and Reserve with Instagram?
I activated Reserve with Instagram but can't see the "Reserve Button" on my Instagram Business Profile.
I cancelled my subscription, but the Facebook button still appears on my Facebook and Instagram page. How do I deactivate this?
I cannot select the Facebook Page I want to connect to, as I am told it is "not eligible". How can I fix this?
I can’t activate Reserve with Facebook or Instagram, because it says “Your account is restricted at the moment”. How can I fix this?
I only want to activate "Reserve with Instagram". Is this possible?
I successfully activated Reserve with Facebook. I want to now activate Reserve with Instagram, but I can't find the "Activate Now" button to start the activation process on DISH Reservation.
My Instagram page doesn't show up in the list of Instagram profiles when trying to link Instagram to Facebook. How can I fix this?
How do I add a reservation link to my Facebook and Instagram Page?
DISH Weblisting Premium
Tutorials
How do I publish a post?
How do I update my profile?
How to create a QR code?
How to purchase the tool?
How to reply to a review?
FAQs
DISH Weblisting
Tutorials
An overview of the general settings
How do I change my password in DISH Weblisting?
How do I connect my Google account?
How do I create my own QR code for my business?
How do I log in to DISH Weblisting?
How do I make the best use of DISH Weblisting?
How do I post content?
How do I reply to reviews?
How do I set up DISH Weblisting?
FAQs
DISH Website
Tutorials
Onboarding
How do I activate my DISH Website?
How do I add a description in the onboarding process?
How do I onboard a business on DISH Website?
How do I set opening hours in the website?
How do I set up a domain for DISH website?
How do I set up options and offerings on DISH Website?
How do I set up the imprint for my website?
How do I set up weblisting in the DISH Website onboarding?
How do I upload the menu on the website?
General / How to use
How do I access DISH Website through a mobile device?
How do I add a description to my website?
How do I add a food ordering service link?
How do I add an event to my website?
How do I add or change a menu on DISH Website?
How do I change the colour palette on DISH Website?
How do I link WhatsApp Click-to-Chat to DISH Website?
How do I link my social media platforms to my website?
How do I reorder the content on my DISH Website?
How do I use AI for my website description?
How to add the Google Analytics code to DISH Website?
How to create or edit my galleries?
How to set up a custom domain?
What the design templates of DISH Website (Professional) look like?
Admin panel
FAQs
Fiscalisation
Fiskaltrust
Cash Register Inspection
Cash Register Reporting with Fiskaltrust
Correcting an invitation to a non-existent eMail address
Fiskaltrust - Create CSV or XML report - Only for Germany 🇩🇪
Fiskaltrust - Create a DSFinV-K report - for Germany only 🇩🇪
Fiskaltrust All System Control
Fiskaltrust Docs
How do I cancel a subscription?
Replace TSE, defect / stolen TSE [DE09]
TSE is inactive after first receipts [DE08]
When a client didn't receive an invitation
DATEV
efsta
How do I deactivate an EFT after the client has stopped using the POS?
Why am I not receiving a confirmation of my electronic invoice?
ticketBAI
How do I register a certificate in the TicketBAI Region? (Non-Qualified Certificate for Autonomous Individuals)
How do I register a device certificate with Izenpe?
How do I register a device in the Araba region?
How do I register a device in the Gipuzkoa region?
Editing Orders and Adjusting Prices
RT Fiscal Printer Support and Maintenance Guidelines for Customers in Italy
- All Categories
- DISH Reservation
- FAQs
- DISH Reservation - FAQs
DISH Reservation - FAQs
Table Plan - What are the benefits of setting up preferred table combinations?
For big groups of guests your restaurant might not have tables of a sufficient size. As DISH Reservation does not automatically know, which of the tables you could move together, you can define table combinations. For example, you could define that for reservations with between 5 and 8 people, table 1 and table 2 should be combined. In this way, when a reservation 5-8 people is made, our system would automatically assign the reservation to table 1 and table 2. Find out how to set up table combinations in our video tutorial.
If you don't set up table combinations, but we know that you have enough capacity, your guest can still make a reservation request, which you would need to review and confirm. This is to allow you to see whether you can seat the guests, for instance by moving existing reservations to other tables.
Table Plan - How can I decide which tables will be given to my guests?
Tables are assigned automatically and we are trying to have the least amount of empty seats on the selected table. Nevertheless, if there are multiple tables of the same size, then users with DISH professional have the feature of assigning priorities. If you prefer to give you tables in the entrance area to the guest first, then give those a high priority. If there are tables which would be equal in group size, the priority is considered to decide which one to select first. Find out how to change your table booking priority in our tutorial.
Can I turn off the automatic assignment of tables to a reservation?
No, this is currently unfortunately not possible.
Can I give my employees access to the reservation tool?
Yes, you can. To do so, log in to your DISH.co account. Click on your name which you will find on the top right of your screen. Select "My Establishments" from the drop-down menu that will appear. Then click on "My Team", and then on "+ Add Person". Type in the contact details of your employee and confirm. He or she will then receive an email with information on how to register.
I don't want my employees to have full access to DISH Reservation. Can I limit what they can see?
Yes, you can. While giving your employees access to the reservation tool, you can define their "roles" and decide which pages of the reservation tool they can see. You could for instance decide that your waiters can only create, confirm and decline reservations. They would only see the related pages on their account.
I still have enough free seats. Why does the system convert a reservation into a reservation request?
There are three scenarios in which this could occur.
- Please check if you defined a group size "up to which you would like reservations to be automatically confirmed". If for example you set this number to 4, it means that reservations for 5 people or more would not be automatically confirmed. This would trigger a reservation request, which you would have to confirm first.
- It could be that you have no available free table or table group for the group size of the reservation. For example, you might receive a reservation for 10 people, but only have 2 tables for 5 people and have not set a table group for this tables. In this case, a guest can make a reservation, which you would need to confirm. This is to allow you to check if you can really seat this person. Check out our tutorial on "How to set up table groups" here.
- If all tables are occupied, but seats are still available (because tables are not fully occupied), a guest can still make a reservation. The system would convert this into a reservation request, so that you may verify whether you can really seat the person or not.
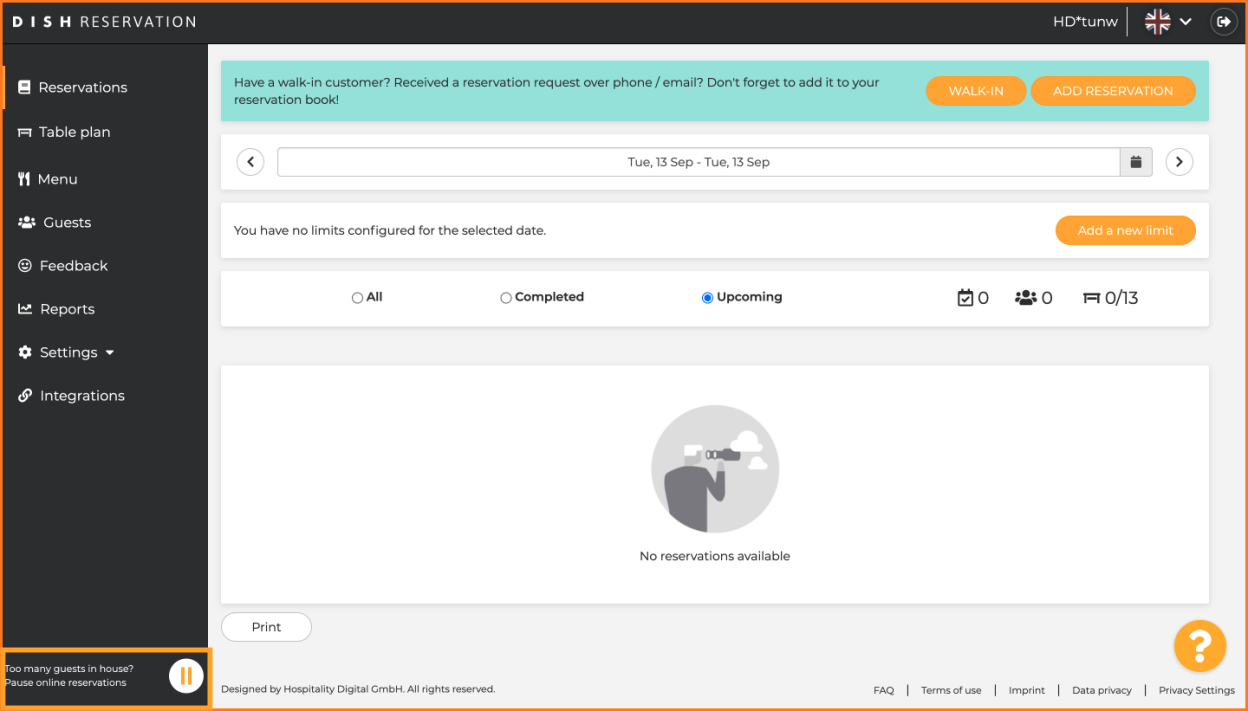
Can I pause online reservations on a short notice?
Yes, you can. On the left menu, right at the bottom, you will find a pause button. Click there to pause your online reservation for the day.
My restaurant is open until 11 pm. Why can't I receive reservations at 9.30pm?
To see if a time slot can be offered to your guest, DISH Reservation looks at two things: the reservation hours you set and the default duration for your reservations. If you set the reservation hours to end at 11 pm, and the default reservation duration to 2 hours, then the last reservation possible on that day would be at 9 pm. If you want to your guests to still make a reservation at 9.30 pm, you would need to make the reservation hours end at 11.30 pm.
I only want my guests to make a reservation up 7 days in advance. Why do I have to allow my guests to book 30 days in advance or longer?
This is because of a technical limitation set by Google. In order to receive reservations via Google, we need to set the minimum to 30 days.
Why can a reservation not be made less than 30 days in advance?
It actually is possible to make reservations less than 30 days in advance. For that, you need to set the notice time for the reservation to less than 30 days.
How does the booking limit function work?
At busy hours, you might want to accept less reservations than usual. To avoid that your kitchen cannot handle the amount of guest coming in at the same time, you can configure booking limits. With booking limits, you can limit the number of guests that can reserve a seat during a specific time interval on any given day. For example, you can define that from 1pm to 2pm you would only want to take online reservations for a maximum of 20 guests. To see how to set up booking limit, check out our video tutorial.
Can I change the default duration of a reservation during my shifts?
Yes, you can. To do so, you need to follow two steps. First, go to settings/hours and set your "meal periods", e.g. lunch and dinner (view our tutorial for more info).
Once this is done, edit the default duration for a reservation in the "capacity section" that you will find in Settings/Reservations. Simply set the default duration of a reservation per meal period, e.g. 1 hour for lunch.
Can I enable my guests to change the duration of their stay?
Yes, you can. To do so, go to the "capacity section" that you will find in Settings/Reservations. There, you can then allow your guests to "set the duration of their stay" and define the minimum and maximum duration of their stay.
Can my guests decide in which area of my restaurant to book a table?
Yes, they can. To activate, simply go to the administration section that you will find in settings/reservations. Then confirm the following question: "Would you like to allow your guests to select the area they are seated in themselves?"
Can I limit the number of online reservations I receive?
Absolutely. You can decide to stop or receive less online reservations for specific days, recurring days, services or restaurant areas. To do so, simply go to settings/reservation limits and activate your first limit.
Which parameters can I set to limit online reservations?
You can stop or reduce availability for online reservations on the following parameters:
- Specific Day (e.g. 1st of July / 1-5th July / Terrace or Bar )
- Date Range (e.g. 1-5th July)
- Area (Close terrace, bar or any area)
- Service hours (breakfast from 8-11 am, weekends)
- Regular Days (on weekends, every Monday)
For this check out our tutorial on:
How can I make sure I don't get too many reservations at the same time (e.g. to better distribute work load in the kitchen)?
At busy hours, you might want to accept less reservations than usual. To avoid that your kitchen cannot handle the amount of guest coming in at the same time, you can configure booking limits. With booking limits, you can limit the number of guests that can reserve a seat during a specific time interval on any given day. For example, you can define that from 1pm to 2pm you would only want to take offline reservations for a maximum of 20 guests. To see how to set up booking limit, check out our video tutorial.
How long does it take for limits to online reservations to show up on Google and on my Widget?
Limits that you set will be active on Google from around 3 am of the following day. For the online widget, limits are active immediately.
I have stopped online reservations for a specific day, can I still manually add reservations?
Yes, you can. With the limit function in place, you no longer need to work around by closing your restaurant to avoid receiving online reservations.
Can I limit the ability of my guests to book specific online tables?
This is currently not possible. We are doing our best to make this available soon.
How do I add a reservation link to my Facebook and Instagram Page?
To continue receiving reservations, follow the steps described here.
Follow this guide to place a reservation link at the top of your Instagram and Facebook accounts. This will help you turn your social media visitors into guests who make reservations at your place.
- Copy the short reservation link from DISH Reservation
- Access DISH Reservation
- Go to Integrations
- Select Standalone Page
- Copy reservation widget link (ex.
https://reserve.dish.co/12345)
- Paste the reservation link into your profile on Instagram (from your mobile phone)
- Login in to your Establishment’s Instagram Page.
- Tap on Edit profile.
- Tap Bio and type "Reservations:" (optional)
- Then tap Add external link.
- In “URL” paste your reservation widget link
- In Title add Reservations (optional)
- Tap Done in order to finish the process.
Need more help? Follow the steps on the screen:
You are all set! You can now receive reservations via Instagram
- Copy the short reservation link from DISH Reservation
- Access DISH Reservation
- Go to Integrations
- Select Standalone Page
- Copy reservation widget link (ex.
https://reserve.dish.co/12345)
- Paste the reservation link into your “About Us” Section on Facebook
- Login to your Establishment’s Facebook Page.
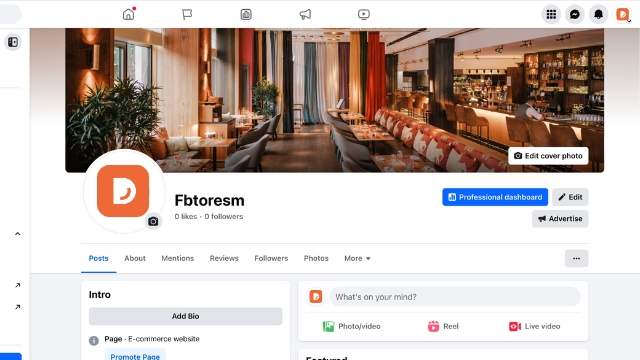
- Click on Add Bio in the Intro Section.
- Paste the reservation widget link (ex: Reservations: https://reserve.dish.co/12345)
- Save your progress.
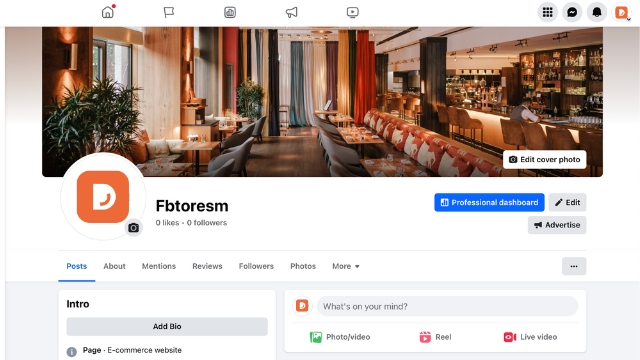
Facebook users can now easily reserve via this link!
How to remove the Reservation button from Facebook?
If you wish to remove the "Reserve" button on Facebook, you can easily follow this steps:
- Login to Facebook.
- Switch to your establishments Facebook Profile.
- Click on “…”
- Click on Edit Action Button.
- Click Delete Button.
- Save you progress.
With this, your reserve button will no longer be available on Facebook and on Instagram.
Need more help? Watch this video:
Is a SMS confirmation send to my client when a reservation is made via Reserve with Google?
No, your guests do not receive a SMS. However, when reserving a table via Google, your client receives an email confirming that a reservation was made.
What is the maximum number of seats that can be booked via Reserve with Google with one reservation?
A person can reserve a table for a maximum of 12 people via Reserve with Google.
How much in advance can my guests make a reservation via Google?
Your guests can reserve a table up to 30 days in advance.
Why is Reserve with Google not available in Slovakia and Romania?
Google has not activated this function in these countries.
How long does it to activate the "reserve a table" button on Google?
Once you completed the onboarding wizzard, it takes Google up to 5 business days to activate "Reserve a Table" on Google.
Why does the "Reserve a Table" button does not appear on Google. And what can I do to fix it?
If the "Reserve a Table" button does not appear on Google, it could be that the restaurant details (name, address) you entered for your restaurant on DISH.co do not match the name of your restaurant as entered in Google My Business. Please make sure the details match, either by changing the name or address for your restaurant on DISH.co or by changing it on Google My Business. Check out our tutorial on how to to activate "Reserve a Table" on Google My Business here.
The restaurant name on DISH.co and Reserve with Google are the same, but "Reserve a Table" still doesn't show.
If guests can book a room to sleep at your place via Google, you won't be able to activate the "Reserve a Table" button. You will have to choose whether your guests can "Reserve a Table" or book a stay. You can select this on Google My Business. This case might occur if you have a hotel with a restaurant attached. Check out our tutorial on how to to activate "Reserve a Table" on Google my Business here.
Also, for Google to display the "Reserve a table" button it needs to recognise you as an establishment, where reservations are considered useful. That means, the button will appear for Cafés, Bars, Restaurants, Beer Gardens, etc. but not for e.g. sportsclubs or hotels. You can check on Google Maps as what type of establishment Google considers you.
Tutorial - How to integrate the reservation tool into Google My Business
Can I write a message to my guest when accepting or cancelling a reservation?
Yes, you can. You can configure additional text in Settings/Notifications, which will be automatically added to every confirmation e-mail to your guests. You can not send an customise inidividual e-mails. To cancel a reservation, you can simply click on the cancel button. This will open a window, where you will be able to add a text to the cancellation email the user would receive (to see how this works, click here).
I don't want my clients to be informed about a cancellation. Can I deactivate this function?
Yes, you can. When clicking on the cancel button in your reservation overview, a window will open in which you can decide not to inform the client about the reservation.
Reviews - Are my reviews displayed on Google?
No. Your reviews are not displayed on Google. You can display them on your DISH Website or any website you are using.
Reviews - What happens if I click on publish my reviews?
If you click on publish my reviews, your reviews can be shown on your website.
Reviews - How can I display my reviews?
If you are using a website of DISH, you can simply publish feedback entries, which you would like to have on your website. If you have an own website, you can simply HTML copy code into your website. You find the code in the HELP section.
In my reservation overview it says "Total number of available seats exceeded". Is my reservation invalid?
No, your reservation is still valid. You can overbook a table if you want to, and you don't need to move or cancel your reservation. You can simply keep the reservation. With this message, we simply want to highlight that you overbooked your table in case you didn't notice.
Why do I have duplicate guest entries?
Unless your guest clicks on "Remember me", when making a reservation online, we are only allowed to keep the guest information for 2 weeks after the reservation. If the same guest does multiple reservations, but does not activate the "remember me" button, we would create a new guest entry for each new reservation, and delete the old data after the reservation happened. This is how double entries can happen.
Why did you switch off SMS and introduce to push notifications?
SMS are no longer the best way to deliver important notifications concerning your reservations. They are short, expensive and limited in their possibilities. That is why we have switched over to push notifications.
You keep all the advantages of SMS, and in addition can:
- Easily see any upcoming reservation in your new notification centre
- Instantly see last minute changes to your reservation
- Add an unlimited number of staff members to be notified
- Directly accept a reservation request via a link in the notification
- Get more information, e.g. view guest feedback and details of change requests
 |  |
How can I get push notifications on my smartphone or tablet?
To get push notifications you need to:
- have an active DISH Professional Reservation or DISH Premium subscription
- be registered as a user with the role “Owner” or “Reservation Manager” to get notification permissions. Learn how get or give permissions here
- download the free DISH App on Google Store (Android) or App Store (iOS)
- allow the DISH App to send you Push Notifications
Push notifications are available on smartphones and tablets. They are not available for laptops and desktop computers.
What type of push notifications will I get?
Which push notifications you can receive, depends on the role that you have been assigned to on Dish.co. If you want to receive all notifications, simply ensure multiple roles have been assigned to you.
Find out how to assign a role here
Overview of what notifications you can receive based on the Role
| Owner | Reservation Manager | Feedback Manager |
New Reservation | Yes | Yes
| No
|
New Reservation Request | Yes
| Yes
| No
|
Cancelled Reservation | Yes
| Yes
| No
|
Changed Reservation | Yes
| Yes
| No
|
New Guest Feedback | Yes
| No | Yes |
Team Member accepted invitation to join as a user | Yes
| No
| No
|
How can I enable push notifications for my team members?
If you want someone from your team to receive reservation related push notifications, you need to ensure he or she:
- has a user account on Dish.co connected to your establishment
- has permissions to receive push notifications, by being the “Owner” or having the role “Reservation Manager” assigned. “Feedback Managers” only receive feedback related notifications.
Here is how to create a new user account and activate push notifications for a team member:
To add a new team member, you need to be the “Owner” of the account.
- Login on Dish.co
- From “Current Establishment” select the establishment you wish to add a team member to
- On top right, tap your profile name
- Tap “My establishments” on drop-down menu
- On header tap “My Team"
- Ensure your name is mentioned in the “Owner Section”. Only owners can add new team members. If it’s not you, ask the “Owner” to add a team member.
- Tap "+Add Person”
- Type Name, Phone number and email of colleague
- In section “Assign roles to your tools” click on DISH Reservation
- Tick the box describing the role you want to assign your colleague
- Select “Reservations Manager”
- Tap “Confirm”
Your colleague will receive an e-mail with the subject line “Join [establishment name] on DISH”. Ask him to accept the reservation and login or sign up. After the login or sign up is done, your colleague will be asked to accept the invitation. Once it’s accepted, he can login to reservation.dish.co and access the tools with the permissions you have given him.
Congratulations! Your colleague can now receive notifications.
How can I add permissions to receive push notifications for an existing user account?
Here is how to add permissions for an existing user account:
- Login on Dish.co
- From “Current Establishment” select the establishment you wish to add a team member to
- On top right, tap your profile name
- Tap “My establishments” on drop-down menu
- On header tap “My Team"
- Tap on “Edit” Icon next to your colleague’s name
- In section “Assign roles to your tools” click on DISH Reservation
- Tick the box describing the role you want to assign your colleague
- Select “Reservations Manager” (will give permission for push notifications).
- Tap “Save”
Congratulations! You have given your colleague permission to receive push notifications.
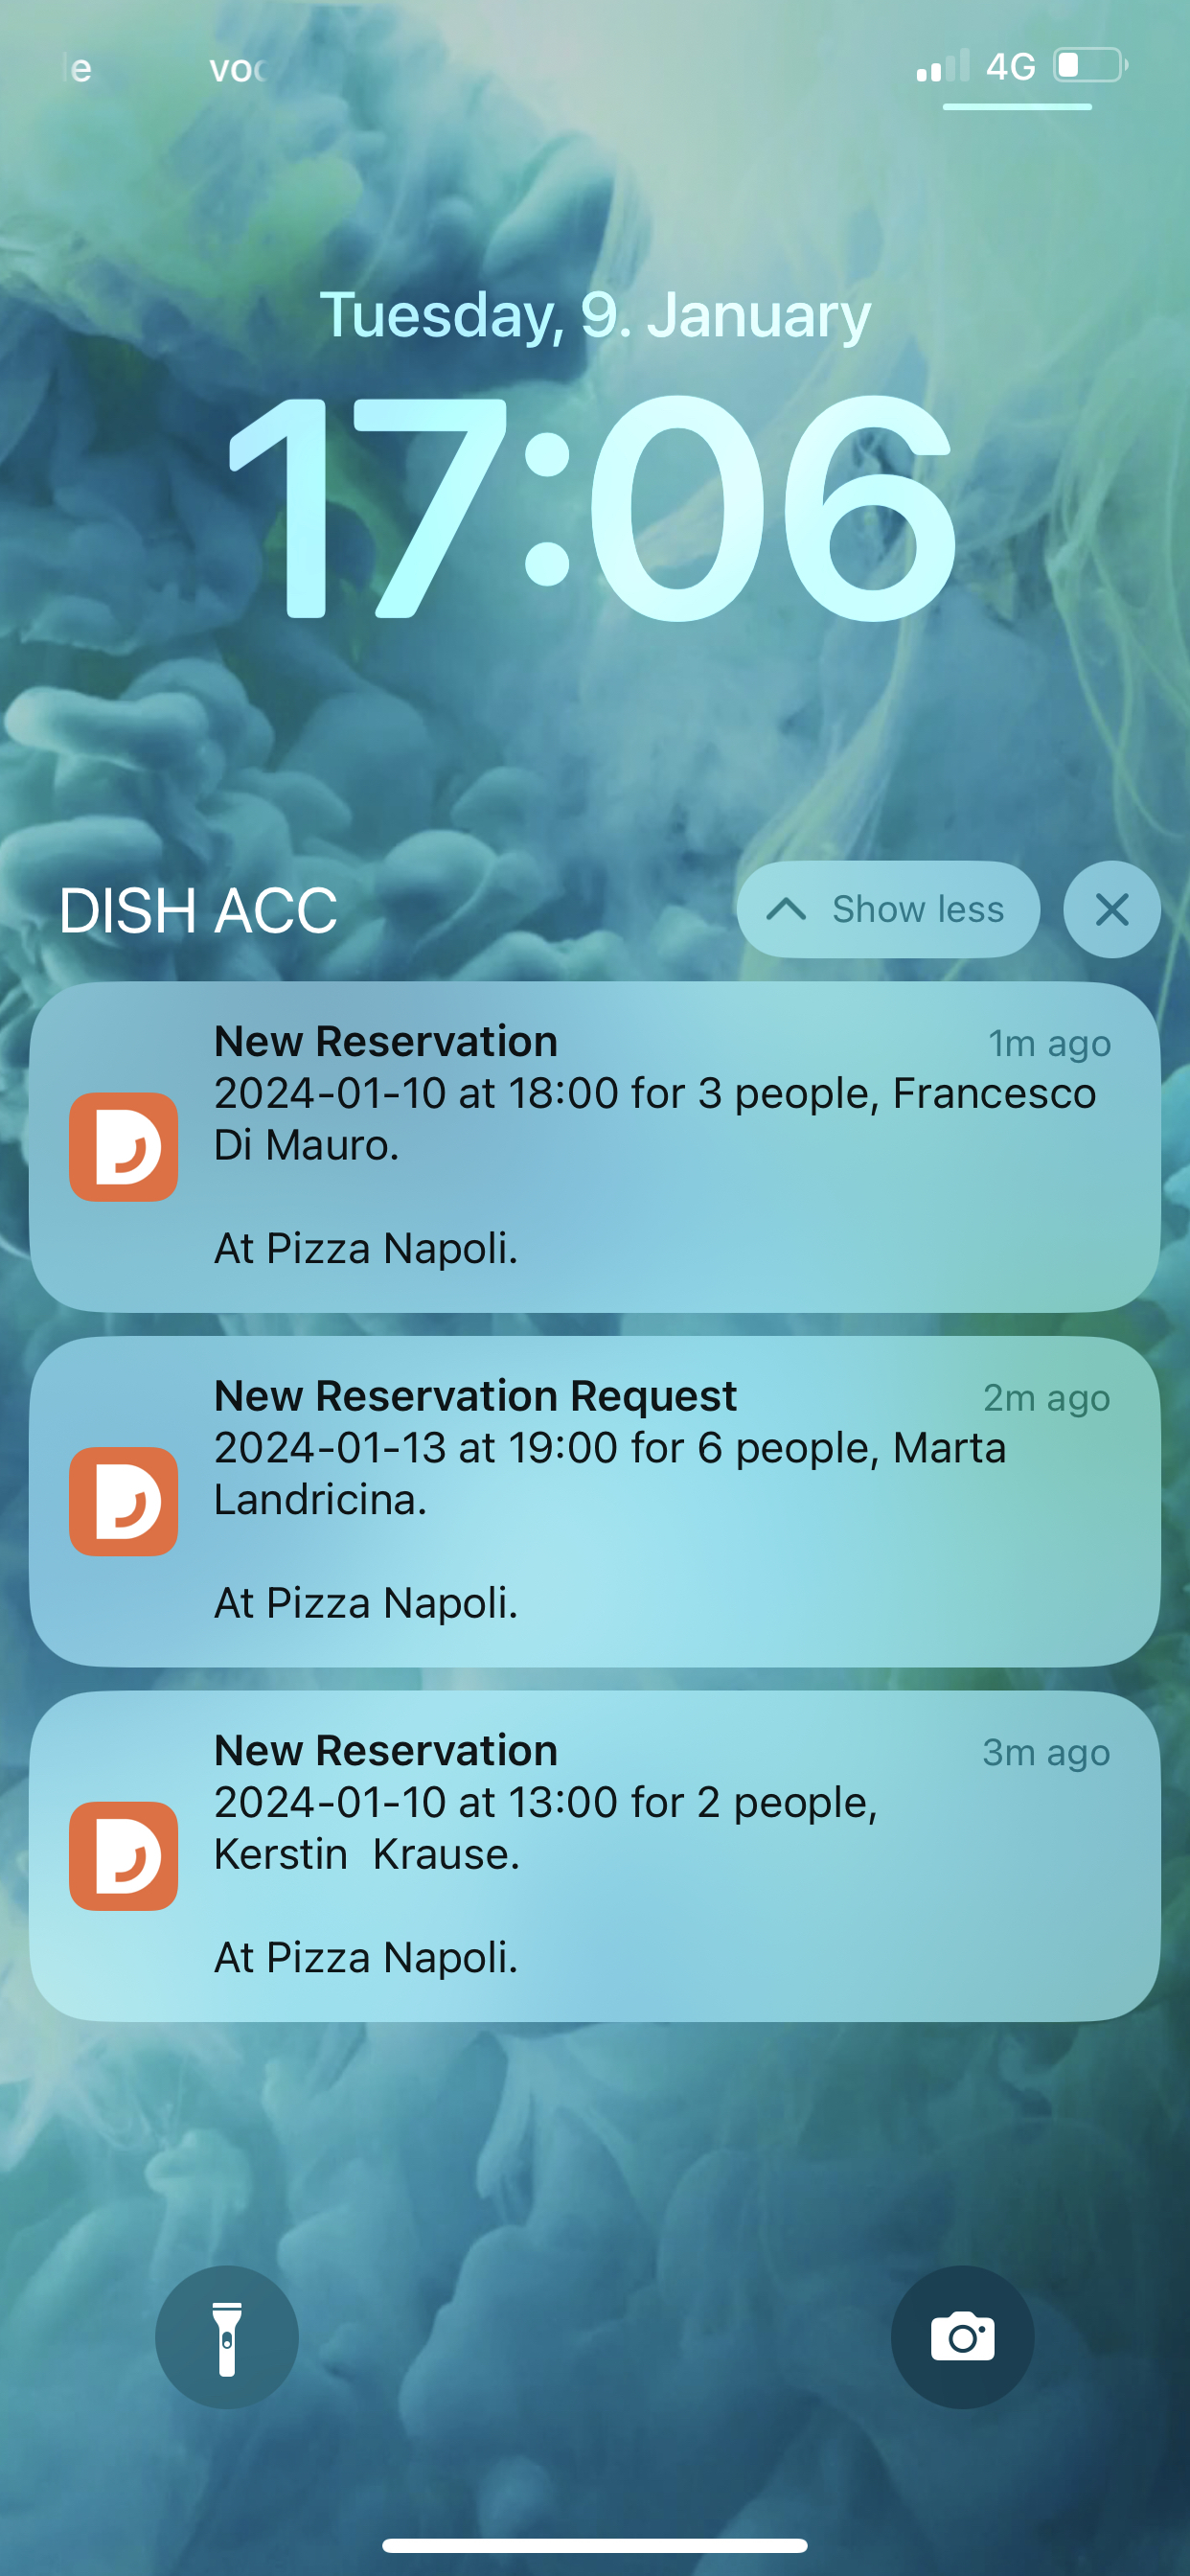
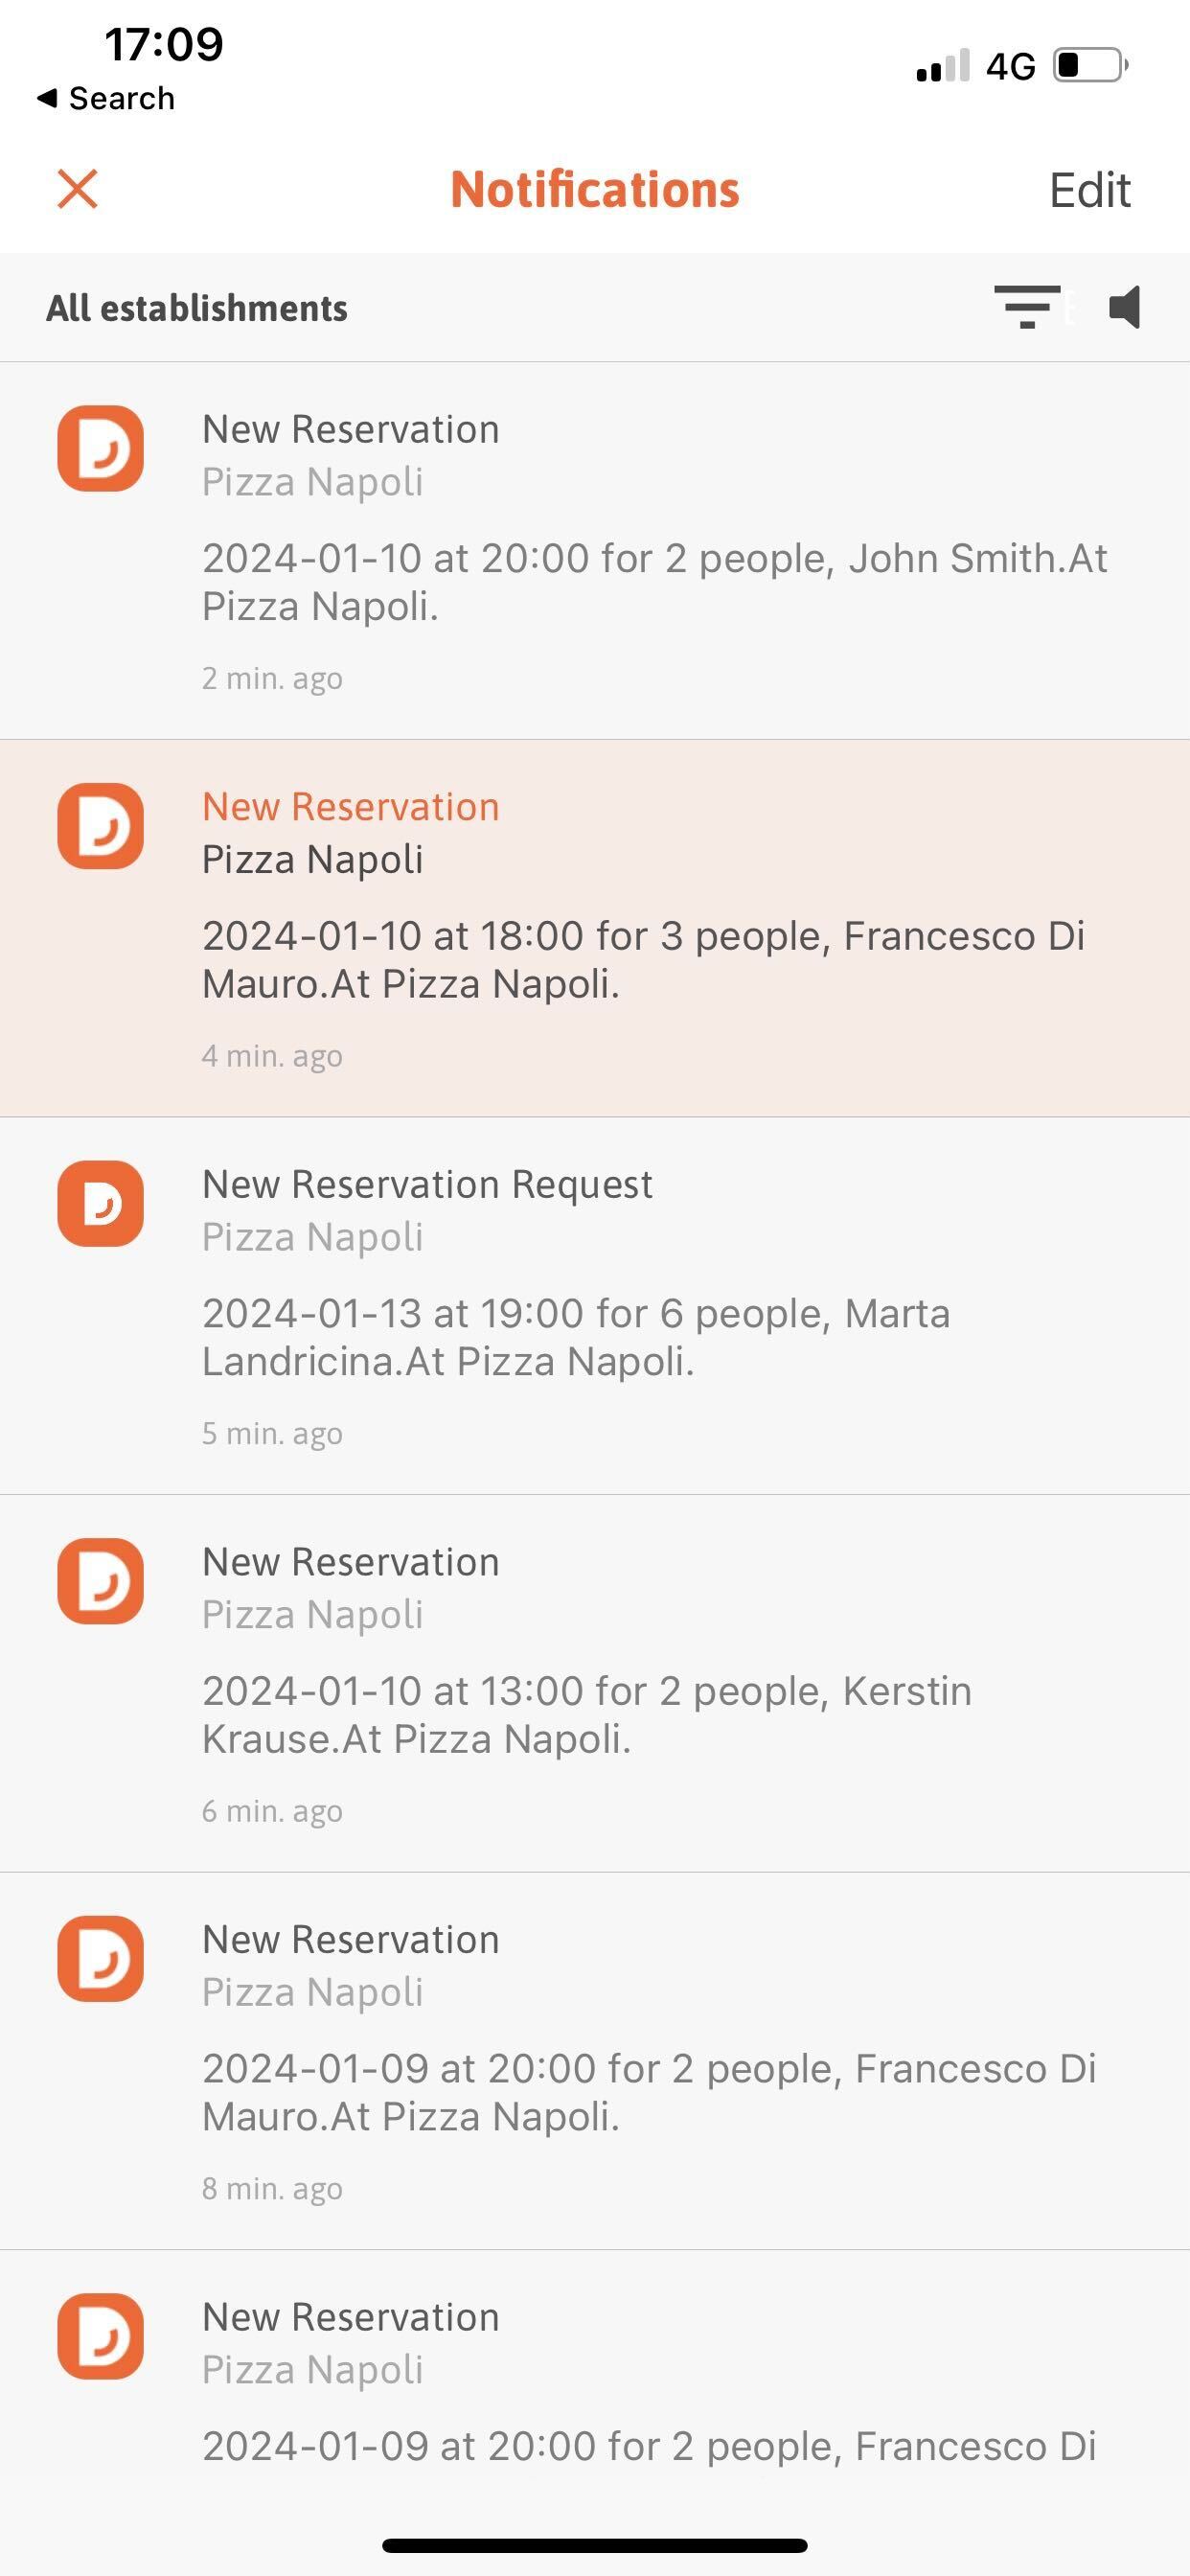
Where can I get an overview of all incoming reservations?
All push notifications are stored in your Notification Centre in the DISH App. There you can see an overview of all future reservations and reservation requests. You can also view cancelled or changed reservations, change requests as well as notifications for new feedback. All reservation related notifications are kept for two weeks after the reservation ended.
The notification centre is available in the free DISH App. To access it, simply click on the bell icon on the top right of your DISH App.
Can I receive push notifications for several establishments?
Yes, you can. If you have several establishments and have the permissions to receive push notifications for them, you will receive all notifications on your mobile and tablet device.
How can I turn off push notifications on my device?
To disable push notifications, follow these steps:
A) On iOS devices (iPhones or iPads)
- Go to Settings and tap Notifications.
- Select the DISH App under Notification Style.
- Disable “Allow Notifications”
B) On Android devices
- Open your device's Settings app.
- Tap Notifications

- Tap the app.
- Turn off the app's notifications: You can turn off all notifications for a listed app or choose from specific categories.
How do I install the DISH App?
- The free DISH App is available on smart phones and tablets. To install it, simply go to the Google Store (Android) or the App Store (iOS)
I can’t seem to receive any push notifications. How can I fix this?
To get push notifications on your phone or tablet you need to have:
- An active DISH Professional Reservation or DISH Premium subscription. Free subscriptions do not receive push notifications.
- Be registered as a user with the role “Owner” or “Reservation Manager”.
- Download the DISH App on Google Store (Android) or on the App Store (iOS)
- Enable the DISH App to send you push notifications
How to enable the Dish App to send you push notifications?
To enable push notifications for new app installations, simply consent to receive push notifications via the pop-up button presented to you when first opening the DISH app.
To enable push notifications for your existing app, follow the following steps:
A) On iOS devices (iPhones or iPads)
- Go to Settings and tap Notifications.
- Select the DISH App under Notification Style.
- Activate “Allow Notifications”
B) On Android devices
- Open your device's Settings app.
- Tap Notifications
- Tap the app.
- Turn the app's notifications on or off: You can turn off all notifications for a listed app or choose from specific categories.
Can I keep on using the web version after I receive push notifications via the DISH App?
Yes, this is possible. You can receive push notifications and keep on using the web version of DISH Reservation. All you need to do is this:
- Download the DISH App to get push notifications
- Keep on using the web version of DISH Reservation for your daily reservation management
Will I continue to receive e-mail notifications after SMS are switched off?
Yes, you will continue receiving email notifications for reservations, reservation requests, changes to reservation and guest feedback.